Coconut Cream Dream Cake
Coconut Cream Dream Cake
© Chef Laura Bonicelli
Pillowy soft layers kissed with tropical coconut and vanilla create pure heaven in cake form. My grandmother's secret was the perfect balance of coconut extract and cream, making this the star of every birthday celebration and summer gathering.
Prep Time
20 min
Cook Time
1 hr
Total Time
3 hr 20 min
Servings
12 servings
Ingredients
- 3 sticksunsalted butter (room temperature)
- 2 cupssugar
- 5 largeeggs
- 1 1/2 teaspoonsvanilla
- 1 1/2 teaspoonscoconut extract
- 3 cupsall-purpose flour
- 1 teaspoonbaking powder
- 1/2 teaspoonbaking soda
- 1/2 teaspoonKosher salt
- 1 cupcoconut cream (stir before measuring)
frosting
- 4 largeegg whites
- 1 cupsugar
- 1 pinchKosher salt
- 4 sticksunsalted butter (cut into tablespoons and brought to room temperature)
- 1/4 cupcoconut cream (stir before measuring)
- 1 teaspoonvanilla
- 1 teaspooncoconut extract
- 3 cupssweetened shredded coconut
- 2-3 cupsassorted berries.
Instructions
- 1
Preheat oven to 350º F.
- 2
Grease 2 8-inch cake pans. Line the bottoms with parchment paper. Grease the parchment and flour the entire pan.
- 3
Cream the butter and sugar together in a stand mixer fitted with a wire whisk for at high speed until fluffy and light. Scrape the bowl down as necessary.
- 4
Add the eggs in, one at a time, beating after each addition to fully incorporate, scraping the bowl down as necessary. Lower the speed and add in the vanilla and coconut extract.
- 5
Combine the flour, baking powder, baking soda, and salt in a bowl.
- 6
With the mixer at medium speed, alternately add the flour mixture and the coconut cream in two additions. Mix until combined. Pour into prepared pans.
- 7
Bake for 50 to , until golden brown on top and springy in the center to the touch; the cake should be pulling away from the sides of the pan. Cool the cake pan on a rack for . Remove the cakes from their pans to the rack and cool completely before frosting.
- 8
=====Frosting=====
- 9
Combine the egg whites, sugar, and salt in the bowl of a stand mixer and set the bowl over a medium saucepan filled with 1-inch of simmering water. Do not let the bottom of the bowl touch the water. Whisk constantly until the mixture reaches 130 degrees, about .
- 10
Remove bowl from heat. In a stand mixer fitted with wire whisk, whip the egg mixture on high speed until its temperature is roughly 80 degrees; it should be glossy and sticky. The total whipping time is about . Reduce speed to medium-high.
- 11
Beat in the butter, one piece at a time. Follow with the coconut cream, vanilla, and coconut extract. Scrape the bowl down as necessary. Continue to whip at medium-high speed until well combined, about .
- 12
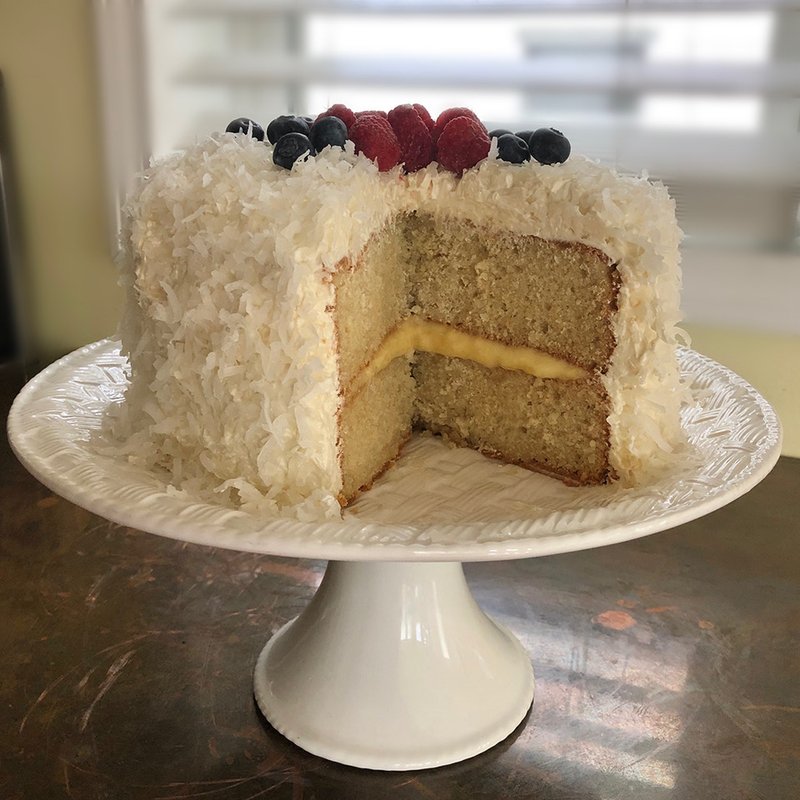
Frost the cake. Sprinkle top and sides with the coconut and top with fruit.
- 13
Store in the refrigerator. Tent the entire cake lightly with plastic wrap after it is chilled. Once the cake is cut, cover the cut part with plastic wrap in addition to tenting the whole cake.
Nutrition Facts
Per Serving (serves 12 servings)
* Nutritional information is estimated and may vary based on specific ingredients and preparation methods.
Chef's Notes
NOTES : If you wish to use toasted coconut to cover the cake, spread the coconut on a baking sheet. Toast in the oven until shreds are a mix of golden brown, with some of the coconut still white, about 15 to 20 minutes. Stir 2 or 3 times while baking. Cool completely. For a variation: Use lemon curd for the filling. For another variation: Split each layer into half horizonally. Stack the layers alternating between lemon curd and frosting. From the bottom up, you will have a cake layer, lemon curd, cake layer, frosting, cake layer, lemon curd, cake layer. Cover the entire cake with frosting.